
Learning to ride
Lessons last 45 minutes. Your first lesson starts at walk, with the coach holding the horse.
Your first 45-minute lesson
The coach adjusts the order and timing to the horse's condition on the day and to the rider.
Arrival, 15 minutes early
Write your height, weight and any health information the coach should know on the registration form, and get fitted for a helmet and gloves.
Meeting the horse, 10 minutes
Approach the horse's shoulder, let it smell your hand and stroke its neck. You also learn where it is safe to stand around a horse.
Mounting, 5 minutes
Step up on the mounting block and mount with your left foot in the stirrup first. Then you adjust the stirrup length and learn how to hold the reins.
Walk, 20 minutes
You walk around the arena while the coach holds the horse. You practise moving off, halting and changing direction, and if there is time you try a short trot.
Dismounting and cooling down, 10 minutes
You walk slowly to let the horse catch its breath, learn how to dismount, and the lesson ends.
Regular lessons
More
So that neither rider nor horse overdoes it, each ride lasts around 45 minutes. After a few rides following your first lesson, once you can move off and stop on your own, you move into group lessons with riders at a similar level.
In group lessons, keep a good distance from the horse in front and pass oncoming horses on the right. When riders go the same way, the horse in the faster gait uses the outer track. Your coach explains the arena rules on your first day.
- Warm-up
- Horse and rider loosen up at walk.
- 5–10 min
- Trot
- Rising trot around the arena with changes of direction and circles.
- 15–20 min
- Focus of the day
- One thing, such as sitting trot, riding without stirrups or preparing for canter.
- 10–15 min
- Cool-down
- Back to walk to let the horse's breathing settle.
- 5 min
Lunge lessons
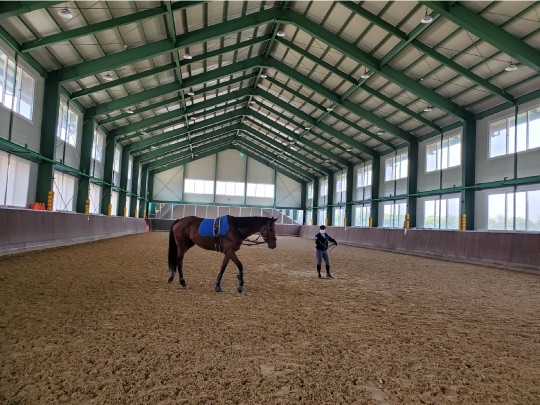
The coach stands in the middle of the arena holding the horse on a long line (lunge line), and the horse circles around the coach. The coach controls the speed and gait, so the rider can focus only on position and balance. You also practise riding without reins or with your feet out of the stirrups.
We recommend it for nervous riders, riders who still find the trot bounce difficult, and anyone who wants a correct position from the start. Experienced riders often take lunge lessons to correct their seat.
Safety around horses
Horses weigh over 400 kg but are easily frightened. Their eyes are on the sides of the head, so they see widely but not directly in front or behind. The most basic rule is simple: do not startle the horse.
- Talk to the horse as you approach its shoulder at an angle. Usually approach from the left.
- Do not walk directly behind a horse. If you must, keep a hand on its hindquarters and stay close, or go round far enough that a kick cannot reach you.
- Stroke the neck rather than the nose, and speak in a low, calm voice.
- Check with the coach before giving treats.
- Mount and dismount inside the arena, following the coach's directions.
- When entering or leaving the arena, pause at the gate and call out "Horse coming in" or "Horse going out".
- Do not run or make loud noises around the stables.
If you fall
More
Even if you lose your balance, do not jump off the horse. If you fall, do not get up in a hurry; move slowly and check whether you are hurt. Keep hold of the reins if it is safe, and let go if it is not. The coach decides whether you get back on.
Other riders in the lesson
- Stop where you are and wait.
- Do not ride up to the person who fell.
- Start again once the coach has checked it is safe and tells you to.
Clothing and helmets
- Fasten your helmet, chin strap included.
- Beginners and youth riders also wear a safety vest.
- Gloves stop the reins slipping.
- Wear shoes or boots with a small heel. The heel stops your foot sliding through the stirrup.
- Wear close-fitting, stretchy long trousers. Jeans can rub the inside of the knees.
- Tie back long hair, take off jewellery and avoid loose, flapping clothes.
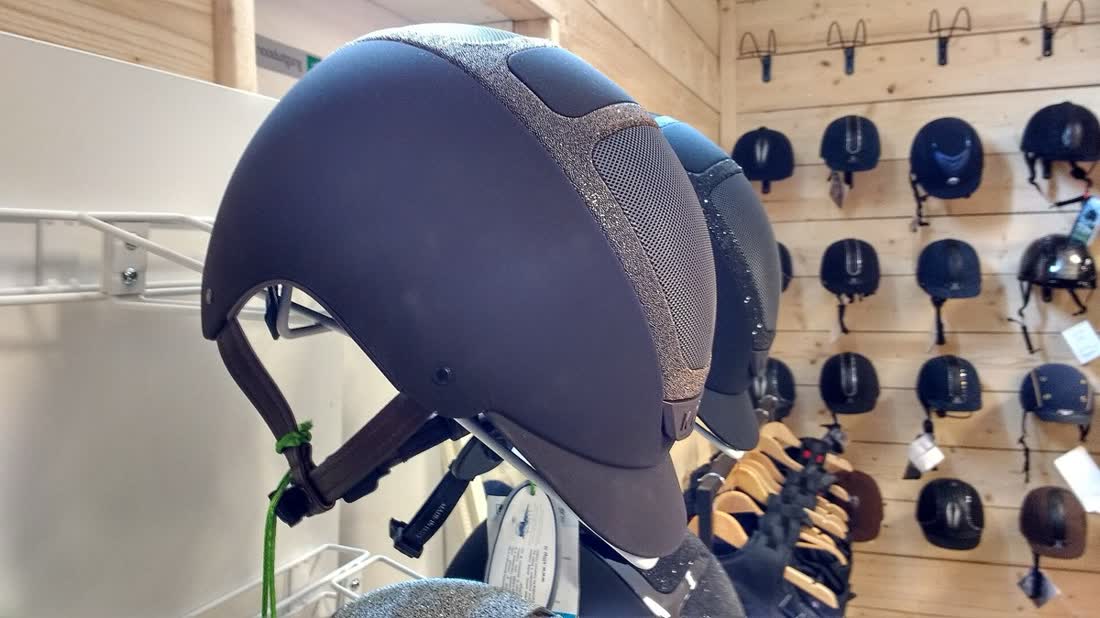
Buying a helmet
You need a riding helmet, not a cycling helmet. When buying, look for a riding helmet standard mark such as EN 1384, PAS 015 or ASTM F1163.
Helmets are designed for a single impact. If you hit your head in a fall, replace the helmet even if it looks undamaged. The KRA Riding Proficiency Certification handbook lists a helmet, safety vest, riding trousers, boots and gloves as basic safety equipment.
Helmet hire details are given when your booking is confirmed.
Correct position and stirrup length
More
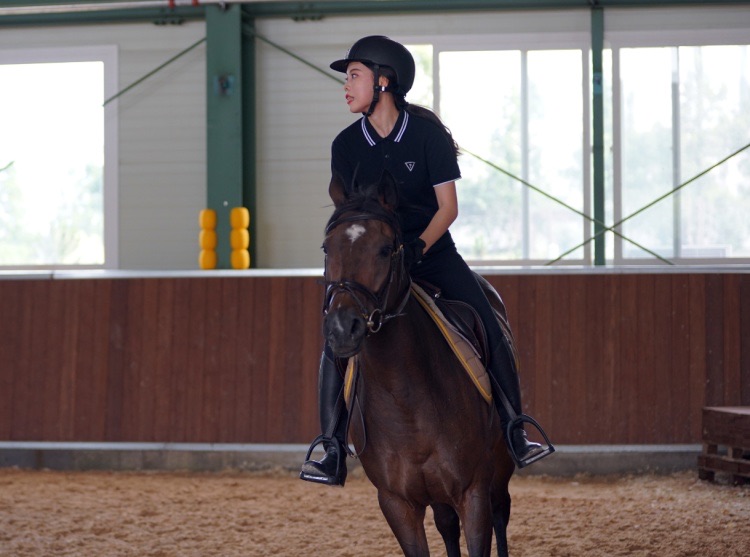
Seen from the side, your ear, shoulder, hip and heel should form one line. Look between the horse's ears, 10 to 13 m ahead.
- Stirrup length
- On the ground, set it to the length of your arm from armpit to fingertips. Mounted, with your leg hanging down, the base of the stirrup should reach your ankle bone. Dressage riders ride longer, show jumpers shorter.
- Same length on both sides
- Foot in the stirrup
- Place the front third of your foot on the stirrup, with weight spread evenly across the big-toe and little-toe sides. Do not force your heel down; relax your ankle and it will drop naturally.
- Soft ankles
- Holding the reins
- Hold them with thumbs on top, without bending your wrists, so there is a straight line from elbow to bit.
- Connect, don't pull
- Aids
- Seat (weight), legs and hands are the natural aids; whip and spurs are artificial aids. The whip is a signal to get the horse's attention, not a tool for hitting.
- Natural and artificial aids
Weight and horse allocation
More
The recommended guideline is that rider plus saddle should weigh no more than 20% of the horse's body weight. Above that, even a 45-minute lesson raises the horse's heart rate and breathing sharply and leaves muscle fatigue.
We use your weight to match you with a horse of suitable build. If your weight exceeds the safe riding limit, riding may be restricted. Telling us accurately helps us choose the right horse for you.
Health notes
Riding is not recommended during pregnancy because of the risk of falling. If you have back, joint or heart conditions, osteoporosis or epilepsy, or have had recent surgery, please talk to your doctor first. Note it on the registration form and the coach will take it into account.
As required by law, the riding grounds hold facility liability insurance. If you ride regularly, we also recommend personal accident insurance.
Riding through the seasons
More
- Summer
- Horses cope with heat less well than people. On hot, humid days we adjust lesson times and intensity, and during heat warnings lessons run early in the morning or in the evening. Drink water often, and wear breathable long trousers.
- June–September
- Rainy season
- We do not ride during thunder and lightning. On humid days the footing is slippery and horses are more sensitive. We will let you know whether a lesson goes ahead, depending on the weather.
- Late June–July
- Winter
- Several thin layers are better than one thick one. Cold hands make the reins hard to handle, so bring gloves. Long padded coats or loose scarf ends can startle horses. On cold days we do a longer warm-up at walk.
- December–February
- Spring, autumn
- The best seasons for both riders and horses, and a good time to start riding.
- March–May, September–November
Exercise benefits of riding
More
A 45-minute ride is moderate aerobic exercise, similar to brisk walking, and trot is more intense. Because you keep balancing on the horse, you use your abdominal, back and inner-thigh muscles a lot. Saddling and grooming are exercise too.
Lessons at Guri Riding Club are for leisure and recreational sport.